
You know that feeling when you’re scrolling through property listings and one just makes you stop? That’s the power of good photography. The truth is, most people decide whether they’re interested in a house within seconds of seeing the photos.
Here’s the thing though: you don’t need to be a professional photographer or own expensive equipment to take photos that sell. Let me walk you through what actually works.
Get the house ready first
This sounds obvious, but I’ve seen so many people skip this step and regret it later.
Walk through every room and remove personal stuff. Family photos, kids’ toys, your collection of coffee mugs on the counter, all of it needs to go temporarily. Make sure your client understands that the home needs to be clean and ready before you arrive, because photography services don’t include tidying up.
Pay attention to details like dusting, vacuuming, and organizing to create a clean, spacious feel that appeals to buyers. Clear off kitchen countertops completely except for one or two decorative items, and remove all personal items from bathrooms including shampoo bottles, soaps, and toothbrushes.
Clean windows make a huge difference. Smudgy glass cuts down on natural light, and natural light is your best friend in real estate photography.
Timing matters more than you think
Schedule your shoot during daytime when natural light can infuse your pictures with vibrant colors and crisp details. If you can, shoot during early morning or late afternoon golden hours when you get soft shadows and warm tones.
Check the weather forecast before your photo session. Rainy or overcast days may not appeal to buyers and could make the property appear dull. You want a bright sunny day, especially if the house has nice outdoor features.
The right equipment (you probably already have some)
You don’t need to drop thousands on gear. Here’s what actually matters:
A decent camera: Modern Sony APS-C cameras or even what you already own will work fine, since you’ll be delivering images at about 2000 pixels wide. Your smartphone might even cut it for starter listings.
A wide-angle lens: This is the one thing worth investing in. Wide and ultra-wide lenses are essential, but don’t go wider than necessary. If you can get the shot at 20mm, you don’t need to go to 14mm just because your lens allows it. Going too wide makes rooms look distorted.
A tripod: Non-negotiable. Any camera movement leads to blurry, distorted images, so invest in a reliable tripod to provide stable support. Even steady hands shake a little.
How to actually take the photos
Position yourself in corners with windows at your side or at a 45-degree angle. Avoid having the window directly in front or behind you. Shoot from corner to corner to make rooms look as big as possible, and always include three walls if you can to give a better idea of the space.
Open all blinds and curtains for maximum natural light effect. Keep interior lights off whenever possible to avoid mixing different light temperatures, which can give photos unnatural hues.
Take photos from chest height or whatever height best suits the room’s contents. The goal is to balance floor and ceiling with the room’s contents without any dead space.
After the shoot: Making photos pop
Even great photos usually need a little help. This is where things get interesting.
You could spend hours learning editing software. Or you could use tools that do the heavy lifting for you.
Tools like IACrea use AI to transform your photos in about 20 seconds. You can furnish empty rooms, refresh spaces that look dated, swap out dull skies for blue ones, or clean up cluttered areas. It’s designed for real estate pros who need fast results without learning complicated software.
The cool part? Eight out of ten people can’t picture themselves in an empty or cluttered space. Being able to show them a furnished, polished version helps them imagine living there.
Before/After AI Real estate photo enhancement examples →

Home interior makeover before and after
What not to do
Go easy on the wide-angle lens in smaller rooms.
Don’t shoot when harsh sunlight is streaming through windows. It creates weird shadows and washed-out spots that are hard to fix later.
Don’t forget about outdoor shots. The front of the house is the first thing people see. Make sure the sun is illuminating the front of the property for the best results.
Good real estate photography isn’t about having the fanciest gear or being an artist. It’s about showing a space at its best so people can picture themselves living there.
Clean thoroughly, shoot when the light is good, use a tripod, and show rooms from their best angles. If you’re short on time or editing skills, tools like IACrea can handle the post-production work so you can focus on actually selling properties.
The photos you put online are often the only shot you get to grab someone’s attention. Make them count.
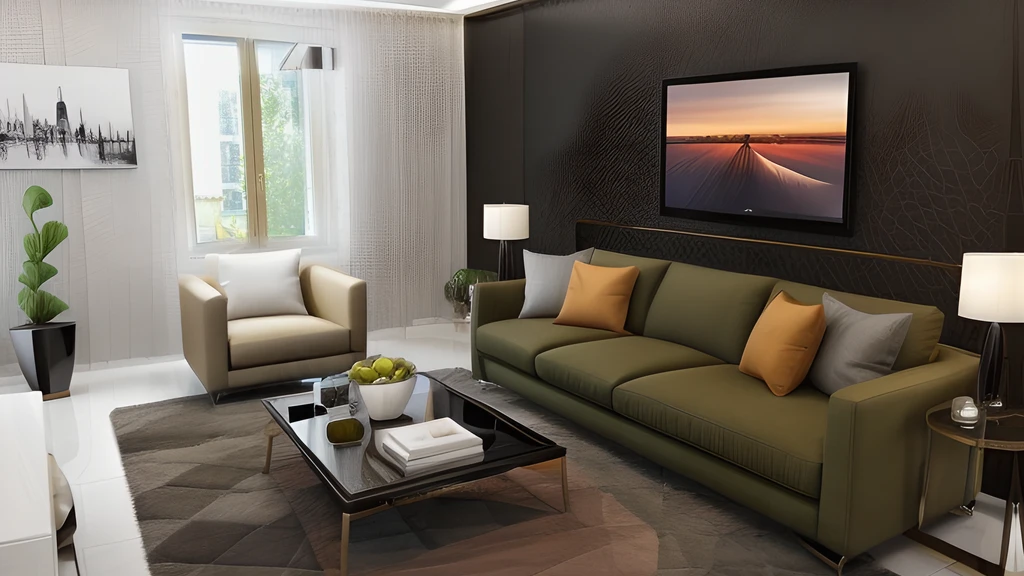
Property photo with IACrea